
Carburetor Diaphragm | Honda CB360 / CL360 / CJ360
Original price was: $28.00.$20.41Current price is: $20.41.
24 in stock
Description
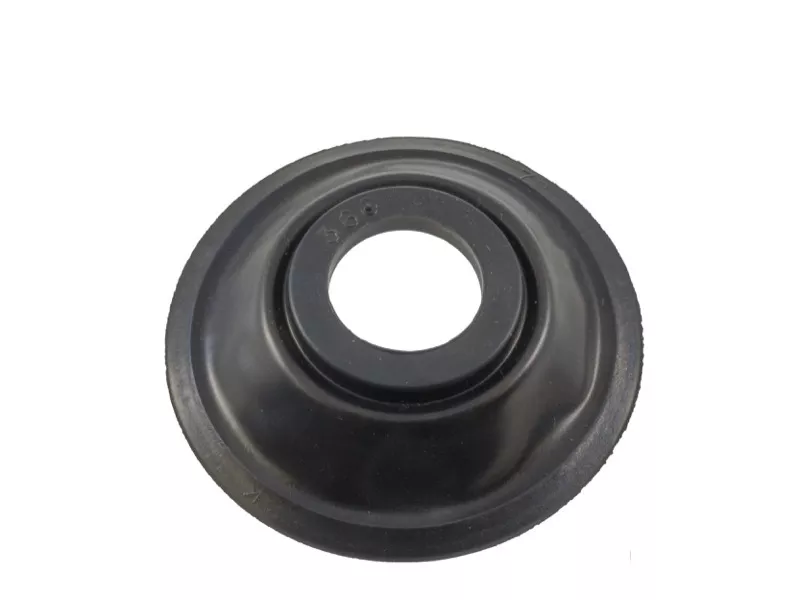
Carburetor Diaphragm | Honda CB360 / CL360 / CJ360
Your CB360 idles fine but bogs or hesitates hard when you open the throttle. The most likely cause is a torn or pin-holed diaphragm inside the Keihin CV carburetor — a rubber membrane that controls the vacuum slide. This replacement diaphragm installs on your existing slides at less than half the cost of OEM, and no complete slide assembly is needed.
Why You Need This
The Keihin CV (Constant Velocity) carburetors on the CB360, CL360, and CJ360 rely on a rubber diaphragm to raise and lower the vacuum slide as engine demand changes. After 50 years, original diaphragms are often torn, melted, or full of pin holes — and even a tiny leak prevents the slide from lifting properly. The result is a bike that idles but falls flat under throttle.
Original diaphragms are nearly impossible to find. These brand new replacements reuse your existing slides and are marked by model to ensure correct fitment. Sold individually — two are needed per bike. Diaphragms and intake manifolds are the primary culprits causing air leaks and tuning problems on these carburetors.
Specifications
| Spec | Detail |
|---|---|
| Replaces OEM Part | 16022-369-004 |
| Fits Models | CB360G (1974), CB360T (1975–1976), CL360K0 (1974), CL360K1 (1975), CJ360T (1976–1977) |
| Carburetor Type | Keihin CV (Constant Velocity), 745/747 series |
| Sold As | Individual (order two per bike) |
Note: CB350 and CB360 diaphragms are different diameters and are not interchangeable. If you have a CB350 or CL350, see our CB350 Carburetor Diaphragm instead.
Installation
Difficulty: Beginner
Tools needed: Wire cutters or tin snips, needle nose pliers, screwdriver, superglue
- Remove the diaphragm cover from the top of the carburetor body.
- Remove the spring and lift out the slide/diaphragm assembly.
- Remove the jet needle from the slide (secured with a screwdriver).
- Cut the two plastic retaining rings that sandwich the old diaphragm on the slide — the 360 rings are thinner and easier to cut than the 350.
- Clean the groove on the slide where the diaphragm seats. The groove is about 1/4 inch tall — make sure it is free of old rubber and debris.
- Install the new diaphragm onto the slide like putting a tire on a rim — work the bead into the groove all the way around. The numbers printed on the diaphragm face up, and the bead faces down into the groove.
- Apply two small drops of superglue between the diaphragm edge and the slide, 180 degrees apart. Let dry.
- Reinstall the jet needle, then drop the slide back into the carburetor body. Orient the two vent holes on the bottom of the slide toward the choke (air cleaner side).
- Use a light coat of gasket sealer on the edge of the diaphragm cover when reinstalling.
Orientation note: The new diaphragms do not have the original indexing tab. Instead, orient the slide so the two vent holes on the bottom face toward the choke (air cleaner side of the carburetor).
Slide check: Before final assembly, drop the bare slide into the carburetor chamber — it should fall freely. If it sticks or hangs up, clean the bore or lightly sand any high spots before proceeding.
Related products
-
- Sale!
- hot sale
Yadea KS5 & KS5 Pro Kickstand – Genuine OEM
- Original price was: $7.20.$4.60Current price is: $4.60.
- Add to cart
-
- Sale!
- hot sale
Disc brake pads (Bengal – Gen 2.0)
- Original price was: $15.16.$11.29Current price is: $11.29.
- Add to cart
-
- Sale!
- hot sale
YADEA COCOA REAR WHEEL ASSEMBLY
- Original price was: $199.20.$102.45Current price is: $102.45.
- Add to cart
-
- Sale!
- hot sale
Empulse M90 Power Assist
- Original price was: $3,816.00.$2,767.31Current price is: $2,767.31.
- Add to cart
-
- Sale!
- hot sale
Yadea Trooper 01 Chain Tensioner – Genuine OEM
- Original price was: $23.20.$14.92Current price is: $14.92.
- Add to cart
-
- Sale!
- hot sale
Genuine Yadea Trooper 01/Trooper Plus Motor Controller – OEM
- Original price was: $88.00.$55.16Current price is: $55.16.
- Add to cart
-
- Sale!
- hot sale
Yadea Elite Prime & KS Series AC Charging Cord (OEM)
- Original price was: $3.20.$1.80Current price is: $1.80.
- Add to cart
-
- Sale!
- hot sale
Yadea KS3 & KS3 Lite Front Fender – Pink OEM Replacement
- Original price was: $4.80.$2.94Current price is: $2.94.
- Add to cart