Clutch Rebuild Kit | Honda CB200 / CL200
Original price was: $56.00.$36.82Current price is: $36.82.
15 in stock
Description
Clutch Rebuild Kit | Honda CB200 / CL200
Engine revs but the bike barely moves when you twist the throttle? If your Honda CB200 or CL200 clutch is slipping under load and cable adjustments no longer help, the friction discs have worn past their service limit. This complete rebuild kit restores positive clutch engagement on the CB200 K0, CB200T, and CL200.
Why You Need This
The clutch on the Honda CB200 family is a multiple-disc wet type that transmits power from the crankshaft to the transmission through friction between the discs and steel plates. Over time the friction material wears down — sometimes unevenly if the cable has been adjusted too tight, which causes the clutch to drag and overheat. Once the friction discs are worn below their service limit of 2.6 mm, no amount of cable adjustment will fix the slip.
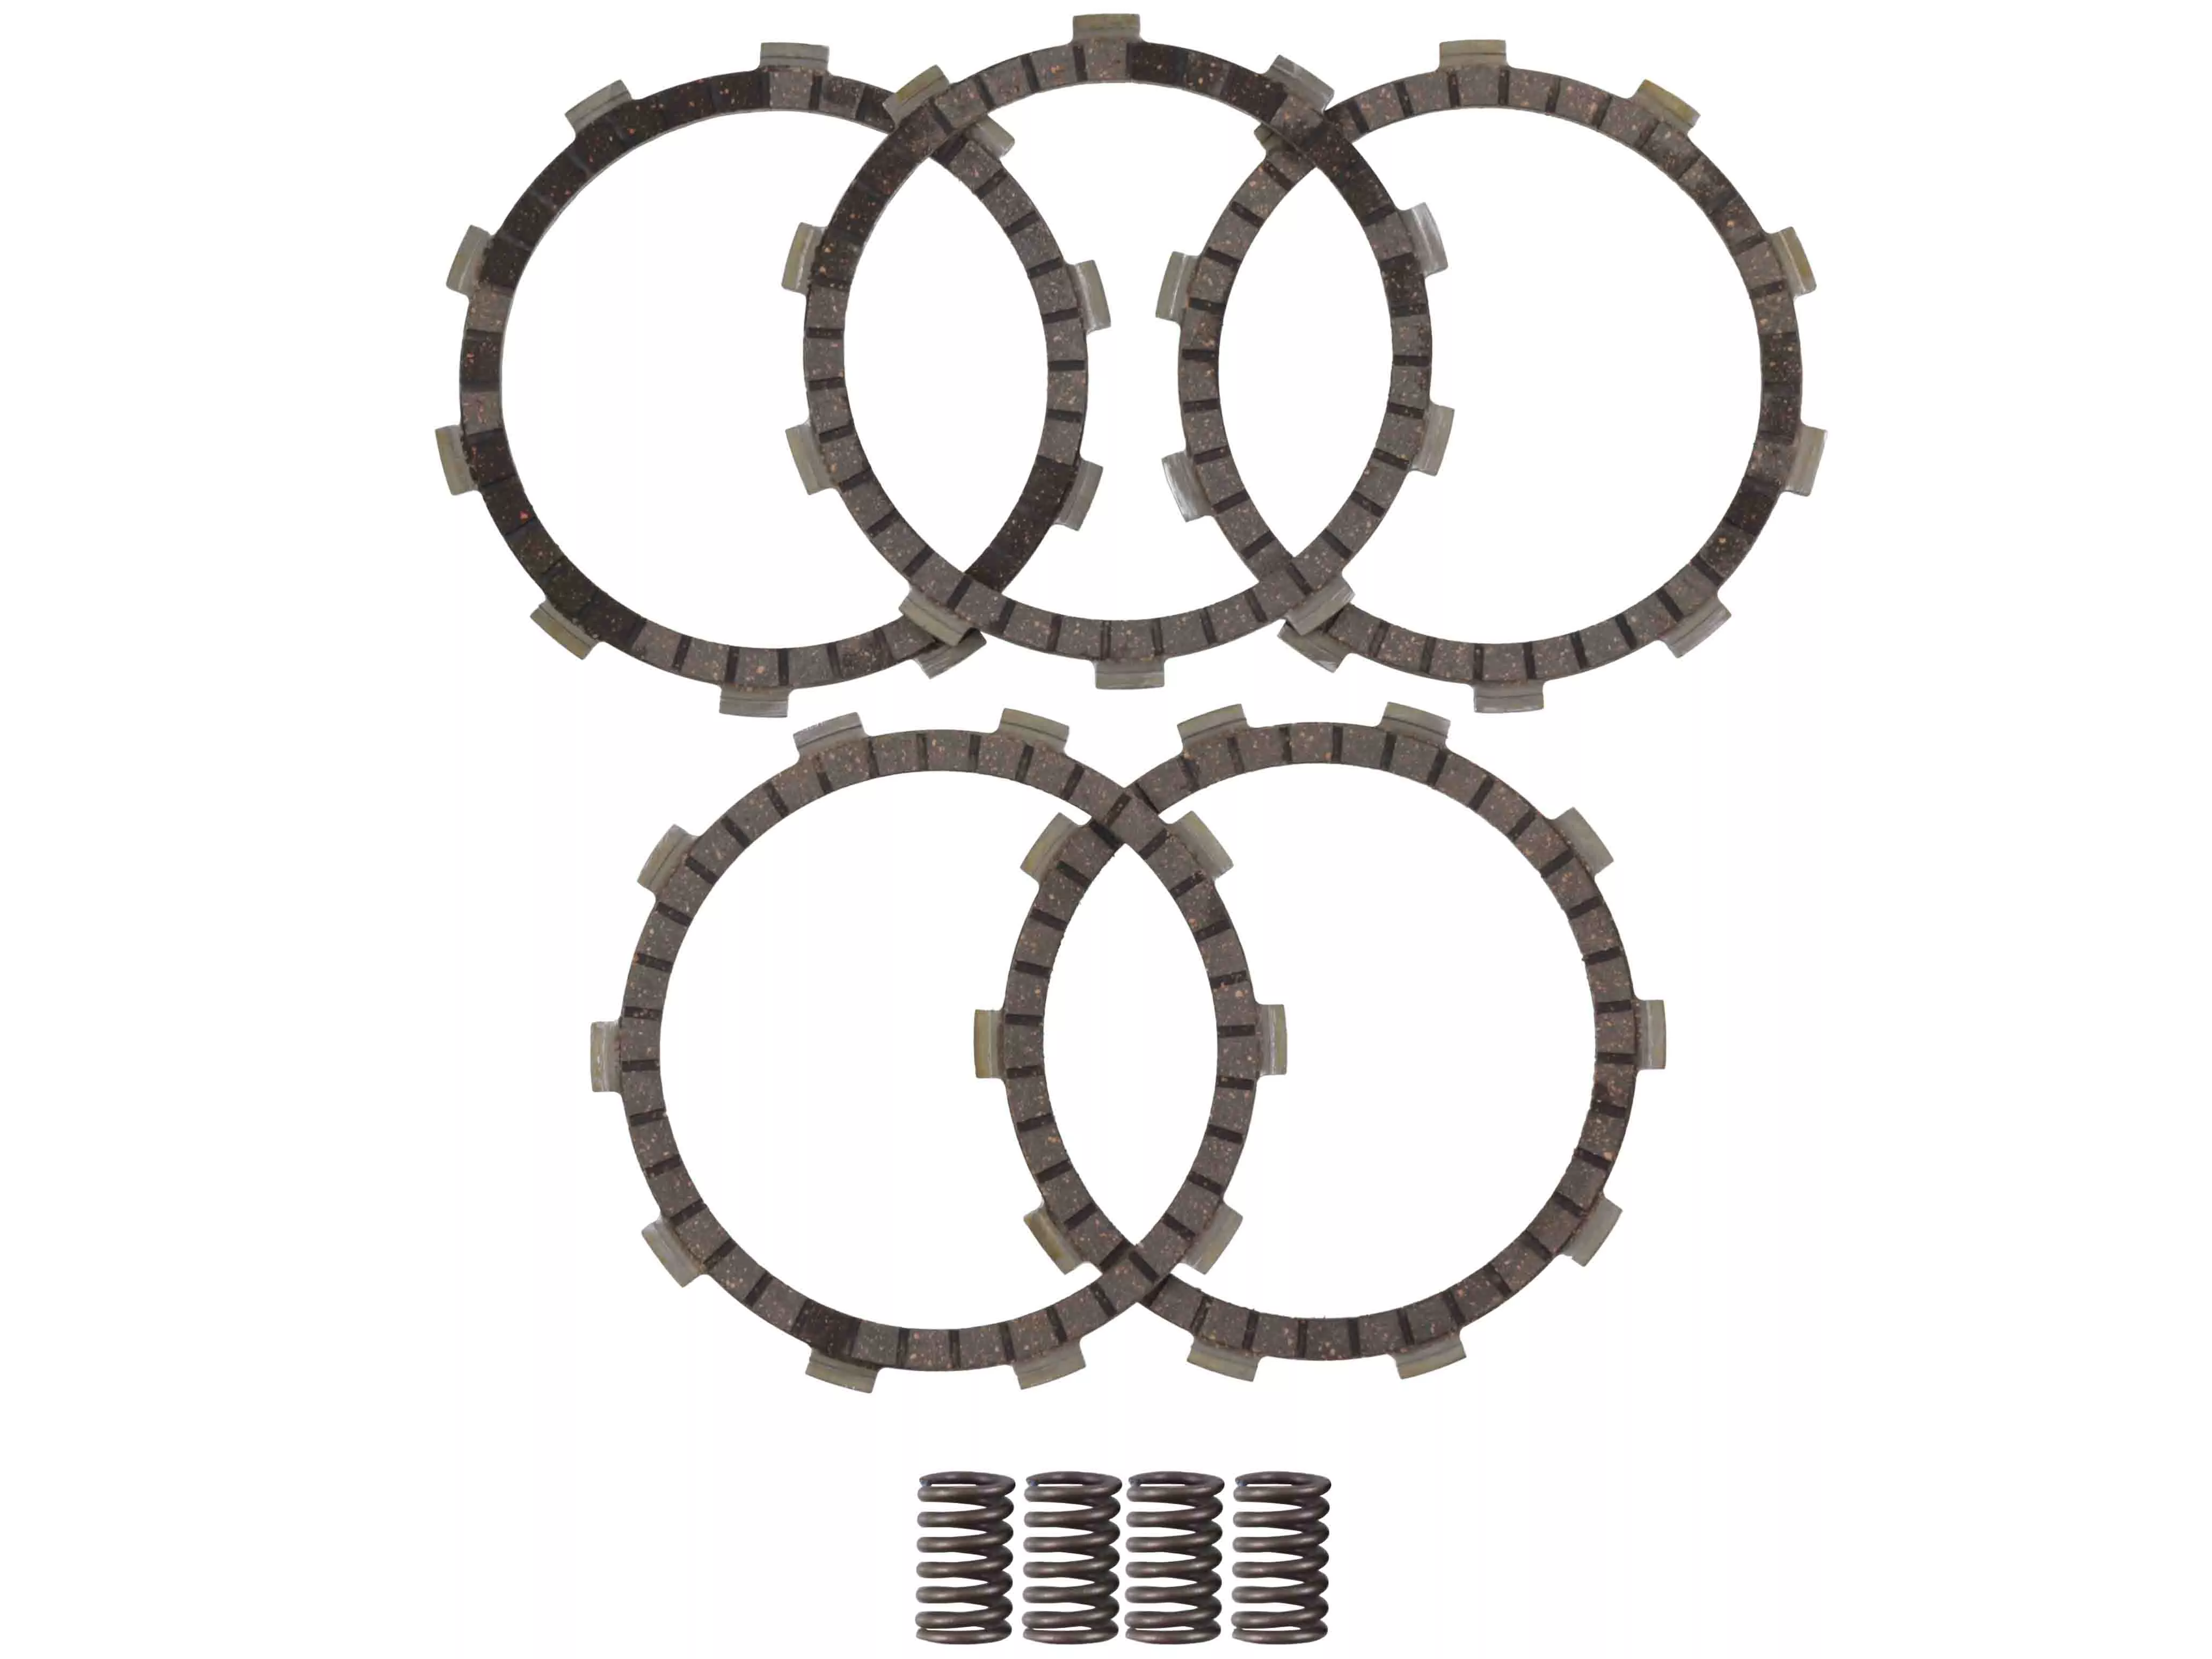
This kit ships with five replacement friction discs and four performance clutch springs. The performance springs provide more clamping force than the factory Honda springs and help ensure positive engagement as the new discs break in.
Specifications
| Spec | Detail |
|---|---|
| Replaces OEM Parts | 22202-ML4-611, 22201-302-000, 22202-ML4-610, 22401-362-000, 22401-362-000 |
| Fits Models | CB200 K0 (1973–1974), CB200T (1975–1976), CL200 (1974) |
| Sold As | Complete Kit (5 Friction Discs + 4 Springs) |
Important Notes
- May Require Modification.These clutch friction discs should be test-fitted dry before installation to confirm that the bottom two discs move freely in the clutch basket and do not bind. Please review our installation notes for more information on why this fitment issue may occur and how to correct it if needed.
- Soak friction discs before installation. The new friction discs must be soaked in 10W-40 motor oil overnight before assembly. The clutch must go together wet — dry discs will glaze and slip immediately.
- Steel plates are usually reusable. Inspect each plate on a flat surface such as granite or glass. If the plate rocks or a feeler gauge slides under easily, it is warped beyond the 0.2 mm service limit and should be replaced. If the steels are dark and glazed from heat, clean them with fine sandpaper on a flat surface to expose fresh metal.
- Check spring free length. The Honda free length spec is 28.26 mm new, with a service limit of 26.7 mm. The four new performance springs in this kit are the correct length for the CB200.
- Do not over-torque the spring bolts. The four 6 mm spring bolts do not require high torque. Tighten in a criss-cross pattern and snug evenly — over-tightening can strip the threads or break the spring posts on the clutch basket.
- Readjust the clutch after installation. New discs change the engagement point of the lever. Reset both the engine-side adjuster and the cable so the lever has 10–20 mm of free play at the tip before the clutch engages.
Model-Specific Notes
- CB200 K0 and CB200T: Remove the right exhaust muffler and the kick starter pedal before pulling the right crankcase cover. Replace the cover gasket on reassembly.
- CL200: The high scrambler pipes route differently, so the right muffler stays on. The kick starter pedal still comes off.
- While you’re in there: The CB200 family has no external oil filter access — the filter sits behind the same right crankcase cover. Clean the filter rotor screen now to save a second teardown later. Refill capacity is 1.7 L (1.8 U.S. qt) of 10W-40 mineral motor oil.
Kit Contents
- Friction discs (5) — replacement clutch friction plates
- Performance clutch springs (4) — stronger clamping force than the factory Honda springs
Installation
Difficulty: Intermediate
Tools needed: 6 mm socket or wrench (for the four clutch spring bolts), flat-blade screwdriver, feeler gauge (optional, for steel plate inspection), drain pan, fresh 10W-40 motor oil
- Drain the engine oil into a clean pan.
- Remove the right exhaust muffler (CB200 K0 and CB200T only) and the kick starter pedal.
- Remove the right crankcase cover bolts and lift the cover away.
- Unscrew the four 6 mm spring bolts and lift off the clutch lifter plate, the four clutch springs, and the spring lifter joint piece.
- Slide the friction discs and steel plates off the clutch center, noting the order as they come out.
- Inspect each steel plate — lay it on a flat surface and check for rocking or a feeler-gauge gap. Replace any plate warped beyond 0.2 mm or deeply scored. Glazed but flat plates can be cleaned with fine sandpaper on a flat surface.
- Before installing the new friction discs, its possible they might need a slight modification. Certain clutch baskets for the CB200, CB200T, and CL200 can cause the bottom 1 or 2 friction discs to bind. If this happens in your clutch basket, see our full modification article on how to minimally file the friction disc teeth so they fit properly.
- Soak the new friction discs in 10W-40 motor oil overnight before installation. The discs must go in wet.
- Reassemble the stack by alternating friction discs and steel plates in the order they came out. Clutch plate B and the disc spring are different from the rest of the stack and must go in their original positions.
- Install the spring lifter joint piece, set the new performance springs on their posts, and start the four 6 mm bolts by hand.
- Tighten the spring bolts in a criss-cross pattern, snugging each one evenly. Do not torque hard — you can strip the threads or break the spring posts on the clutch basket.
- Clean the oil filter rotor screen now — this is the only access point on the CB200.
- Fit a fresh right crankcase cover gasket, reinstall the cover, kick starter pedal, and muffler.
- Refill with 1.7 L (1.8 U.S. qt) of fresh 10W-40 mineral motor oil.
- Adjust the clutch. Slacken both cable adjusters fully, then turn the engine-side adjuster screw in until you feel resistance and back it off a quarter to a half turn. Lock the engine-side adjuster and dial in 10–20 mm of free play at the lever tip from the handlebar adjuster.
Modification Required: Certain clutch baskets for the CB200, CB200T, and CL200 can cause the bottom 1 or 2 friction discs to bind. If this happens in your clutch basket, see our full modification article on how to minimally file the friction disc teeth so they fit properly.
Adjustment tip: If your clutch lever pops or clicks when you squeeze it, the cable is too tight. A tight cable pre-loads the lifter mechanism, so each pull of the lever snaps past the engagement point instead of moving through it smoothly. Back off the cable until the lever has the full 10–20 mm of free play at the tip before the clutch starts to disengage.
Related products
-
- Sale!
- hot sale
Yadea KS3 & KS3 Lite Front Fender – Pink OEM Replacement
- Original price was: $4.80.$2.94Current price is: $2.94.
- Add to cart
-
- Sale!
- hot sale
Yadea KS3, KS5 & KS5 Pro LED Headlight – Genuine OEM
- Original price was: $7.20.$4.00Current price is: $4.00.
- Add to cart
-
- Sale!
- hot sale
V-brake pads (Gen 2.0)
- Original price was: $7.16.$4.88Current price is: $4.88.
- Add to cart
-
- Sale!
- hot sale
Knobby tire 12.5″ (Gen 2.0)
- Original price was: $28.00.$18.12Current price is: $18.12.
- Add to cart
-
- Sale!
- hot sale
Yadea KS3 & KS3 Lite Front Fender – White OEM Replacement
- Original price was: $4.00.$2.47Current price is: $2.47.
- Add to cart
-
- Sale!
- hot sale
Yadea KS6 Pro Rear Hub Motor w/ Tire – Genuine OEM
- Original price was: $130.40.$99.99Current price is: $99.99.
- Add to cart
-
- Sale!
- hot sale
Zippie Backpack
- Original price was: $68.00.$42.63Current price is: $42.63.
- Add to cart
-
- Sale!
- hot sale
Empulse M90 Power Assist
- Original price was: $3,816.00.$2,767.31Current price is: $2,767.31.
- Add to cart