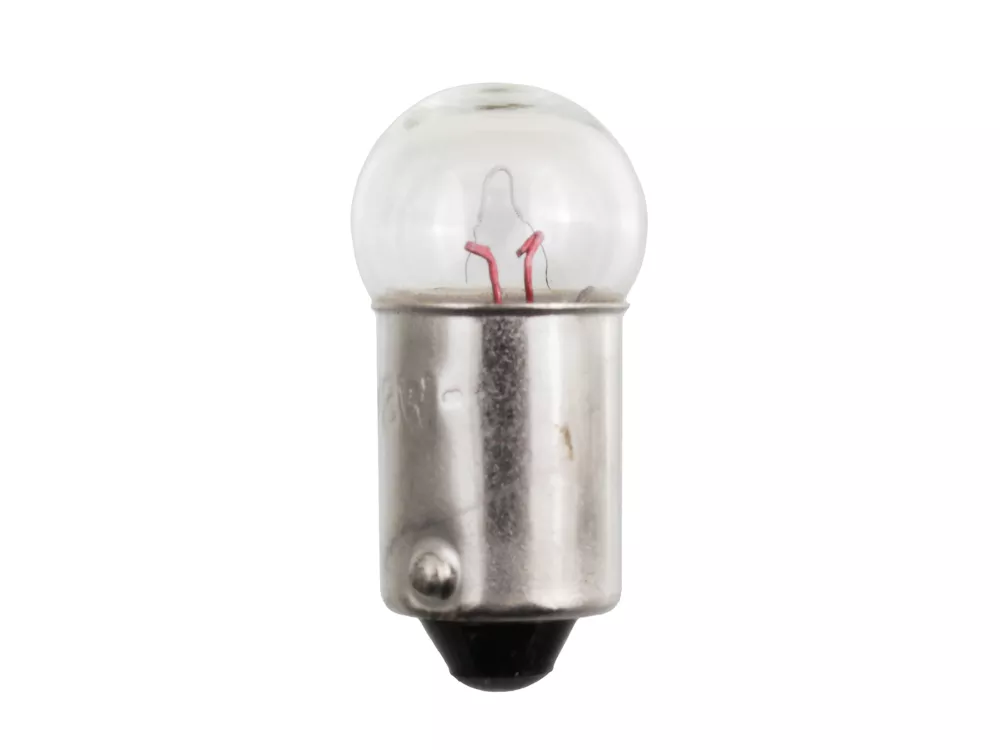
Incandescent Instrument Gauge Bulbs (5-Pack)
Original price was: $5.60.$2.85Current price is: $2.85.
56 in stock
Description
Incandescent Instrument Gauge Bulbs (5-Pack) | Honda CT90 / CB175 / CB350 / CB450 / CB550 / CB750
You hop on your vintage Honda after dark and the speedometer face is half-lit, the neutral light is dead, and you can’t tell if the high beam is on. After fifty-plus years, those tiny dash bulbs burn out — usually one or two at a time — until you can’t read your gauges. These are the OEM-style replacements that fit every E-base socket on the cluster.
Why You Need This
Every gauge cluster on a vintage Honda twin or four uses a handful of these tiny bulbs. Two bulbs sit behind the speedometer face and two more behind the tachometer face, illuminating the dial. Each indicator light — neutral, high beam, turn signal — uses one more. On most twins that adds up to seven bulbs per cluster.
After decades of vibration, heat cycling, and corroded sockets, it’s normal for at least one bulb to be burnt out on any unrestored vintage Honda. Replacing all of them at once is faster than chasing them one at a time, which is why we sell them in sets of five.
Specifications
| Spec | Detail |
|---|---|
| Replaces OEM Part | 34902-259-000 |
| Voltage Options | 6V/3W or 12V/3W (choose at checkout) |
| Bulb Type | Incandescent, E-base instrument cluster bulb |
| Fits Models | CT90, CB100, CL100, CB125, CL125 (6V) — CB175, CL175, SL175, CB200, CL200, CB350, CL350, SL350, CB360, CL360, CJ360, CB450, CL450, CB500K, CB500T, CB550K, CB550F, CB750 (12V) |
| Sold As | Set of 5 bulbs |
Note on wattage by model: Honda’s factory wattage spec varies slightly across the lineup. Most twins (CB175, CB350, CB450) use 12V-3W instrument bulbs as printed in their factory manuals. The CB360/CL360/CJ360 family was rated at 12V-3.4W, and the CB550F was rated at 12V-2W. All of them share the same physical socket and our 12V/3W bulb is interchangeable across the family — it’s the universal industry-standard fit.
Important Notes
How many do you actually need? A standard Honda twin uses about seven instrument bulbs total, so a single 5-pack covers most of the cluster with two spares. The deluxe gauge cluster on CB500T, CB550, and CB750 has nine bulbs because of an additional turn signal indicator and an oil pressure light — those bikes need at least two 5-packs to fully replace everything.
Thinking about LEDs? Our LED Instrument Gauge Bulbs drop into the same sockets and pull about a third of the power. If you’re converting to LED for the first time you’ll also need our LED Indicator Diode so the single turn signal indicator works correctly with the new bulbs, plus an Electronic Flasher Relay if your turn signals go LED at the same time.
Model-Specific Notes
- CB500T / CB550 / CB750 (deluxe cluster): Nine instrument bulbs total — two for each gauge face plus five indicator lights (neutral, high beam, two turn signal indicators, oil pressure). One 5-pack is not enough.
- CT90 K0: The early CT90 K0 used a smaller bulb for all three gauge lights — see our CT90 Dash Light Bulb instead.
- CT90 K6 and later: Uses the small dash bulb only for the high beam indicator. The rest of the cluster takes our standard 6V instrument bulbs from this listing.
- CB125 / CL125: Honda built these as 6V machines (confirmed in the CB125-CB175 factory manual), so they take the 6V variant from this listing — not the 12V.
Installation
Difficulty: Beginner
- Remove the headlight from the bucket so you can reach the back of the gauge cluster (most models have two screws on the headlight rim).
- Trace the bulb sockets up into the back of the speedometer and tachometer housings — they twist out of rubber grommets.
- Pull the old bulb straight out of the socket. Inspect the socket — vintage sockets corrode, which is the most common reason a “good” bulb still doesn’t light up.
- Clean the socket contacts with steel wool or a Scotch-Brite pad until the metal is bright.
- Apply a small dab of dielectric or white grease to the new bulb base before installing it. This stops the bulb from seizing in the socket so the next replacement is easy.
- Push the new bulb into the socket and reseat the socket in the gauge housing.
- Test before reassembling — turn the key on and check each gauge light and indicator.
Wiring tip: On pre-1973 Honda twins, the gauge backlights and the taillight running light share a single fuse on a brown-with-white-stripe wire from the headlight switch. If your gauges all go dark at once, that’s the fuse to check first.
Related products
-
- Sale!
- hot sale
Yadea KS3, KS5 & KS5 Pro LED Headlight – Genuine OEM
- Original price was: $7.20.$4.00Current price is: $4.00.
- Add to cart
-
- Sale!
- hot sale
Coupler plate -QR attachment mechanism (sold per side)
- Original price was: $59.96.$39.98Current price is: $39.98.
- Add to cart
-
- Sale!
- hot sale
Disc brake pads (Bengal – Gen 2.0)
- Original price was: $15.16.$11.29Current price is: $11.29.
- Add to cart
-
- Sale!
- hot sale
Zippie Backpack
- Original price was: $68.00.$42.63Current price is: $42.63.
- Add to cart
-
- Sale!
- hot sale
Battery charger UL/ USA (Gen 2.0)
- Original price was: $19.96.$12.07Current price is: $12.07.
- Add to cart
-
- Sale!
- hot sale
Standard tire 12.5″ (Gen 2.0)
- Original price was: $20.00.$11.59Current price is: $11.59.
- Add to cart
-
- Sale!
- hot sale
Inner tube for 12.5″ tire (Gen 2.0)
- Original price was: $12.00.$6.78Current price is: $6.78.
- Add to cart
-
- Sale!
- hot sale
YADEA COCOA REAR WHEEL ASSEMBLY
- Original price was: $199.20.$102.45Current price is: $102.45.
- Add to cart